Posts

Showing posts from 2019

How to make a bubble machine at home

Image
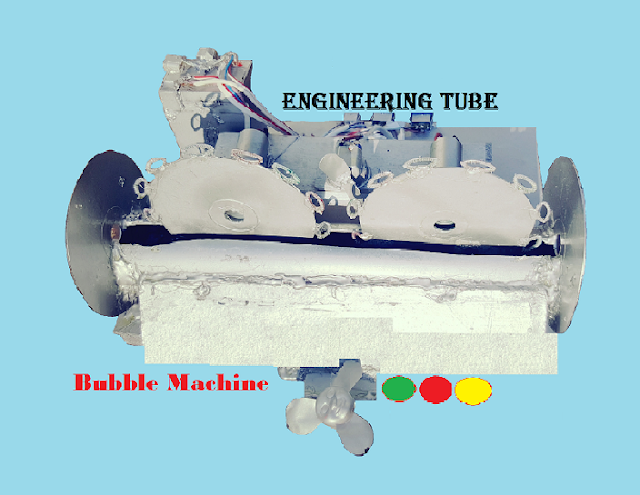
Hello Friends and Welcome to Engineering Tube. In this blog, I will show you how to make a bubble machine with a simple Idea. With the help of this project, you can make a lot of bubbles in a very short time. Hope you will enjoy this project. Let Gets started Components Your needs are: 1: PVC Pipe,2: Old DVD’s 3: Plastic bottle 4: Glue gun 5: DC Gear motors 6: simple DC Motor   7: bubble wands.8: Lasani thin board 9: Spray paints.Connecting Wires, 10: Soldering Iron, 11: Soldering Wire, 12: Sleeves shrink Tube, 13: 6 volts Battery, 14: Buttons,15: Cutter, 16: Bubble Wands. Construction: Form PVC Pipe, Old DVD’s and Plastic bottle head make a shape that shows in the image it's very simple. Lasani thin board for holding the components. Buy Bubble Wands from the market it's easily available for holding the solution mixture. Now Glue it with the outer side of the DVD disk. The other things you need are 2...

Use DPDT AC Relay as Automatic ON and OFF Switch

Image
Replace Manual Change over with an AC Relay for automatic turning ON and OFF Switch About the AC relay: The relay that use for automatic turning on and off switch is DPDT   (Double Pole Double Throw) AC high voltage and high current Relay. The coil voltage is 220 volts AC. The line voltage is 28v DC   and   250V AC. The current rating is 120 Amperes. This is the two poles AC Relay. which has 8 Terminals, two terminal is connected to the relay coil.   Each pole has 3 terminals one is common which is connected to the load. while the other 2 pins which are normally open “NO”   and Normally closed “NC” .NO terminal is connected to the   Generator cable while NC   is connected to the Grid station power. Connection: First connect the load wires to the common pins of the AC relay. After that connect the Generator wires to the “NO “ pins of the relay. Connect one wire to the one pole NO terminal and the other wire to the other pole ...

How To Use Solar Charge Controller:

Image
Hello Friends and welcome to my Blog. In this blog you will be learn how to install a solar charge controller in a few mints. Let’s gets started What is a Solar Charge Controller?          Guys solar charge controller is a device which is basically use for controlling or regulating voltage and current that come from solar "PV" panels to the battery. Actually the solar charge controller protects batteries from overcharging. Most of the 12 volt solar panel output voltage is about 16 to 20 volts. If you give these high voltages direct to 12 volts battery your battery will be damage from over charging. Most Batteries needs around 14 to 14.5 v to get fully charged. Little bit about the solar charge controller that I am using: The controller that i am using is CM3024Z .This charge controller is come in different amperes rating like 10A,20A,30A etc .The one that i am using is 30A .it’s easily available in the market and also cheap in...

How To Use A Digital Multimeter :

Image
Digital Multimeter (DMM).   A multimeter is a device which is use for measuring different parameters of electrical energy. Such as voltage, current ,resistance, continuity and much more. Multimeter has multi functionalities like, it acts like ammeter, voltmeter and ohmmeter. There are two main types of multimeter .Analog multimeter and digital multimeter. How to Measure DC VOLTAGE: (— ,  - - -)   To measure the DC Voltage on multimeter .First you need to rotate the rotary switch pointer tip toward the DC Voltage section. Normally we measure voltage up to 20 volts its better to bring pointer tip on 20v .Then Connect the probe to DMM insert Black in Black input jack   and red in middle red input jack. After that connect one probe tip to the battery terminal and the other to the next terminal .The digital value   will be show on the display screen on DMM   it will be show you the exact voltage of your battery or any DC source you connect. ...